catalog workflows
Bulk Edit WooCommerce Product Photos
Edit WooCommerce product photos in bulk without downloading and re-uploading files: connect the store, pick products, apply one look, review each replacement, publish, and restore if needed.
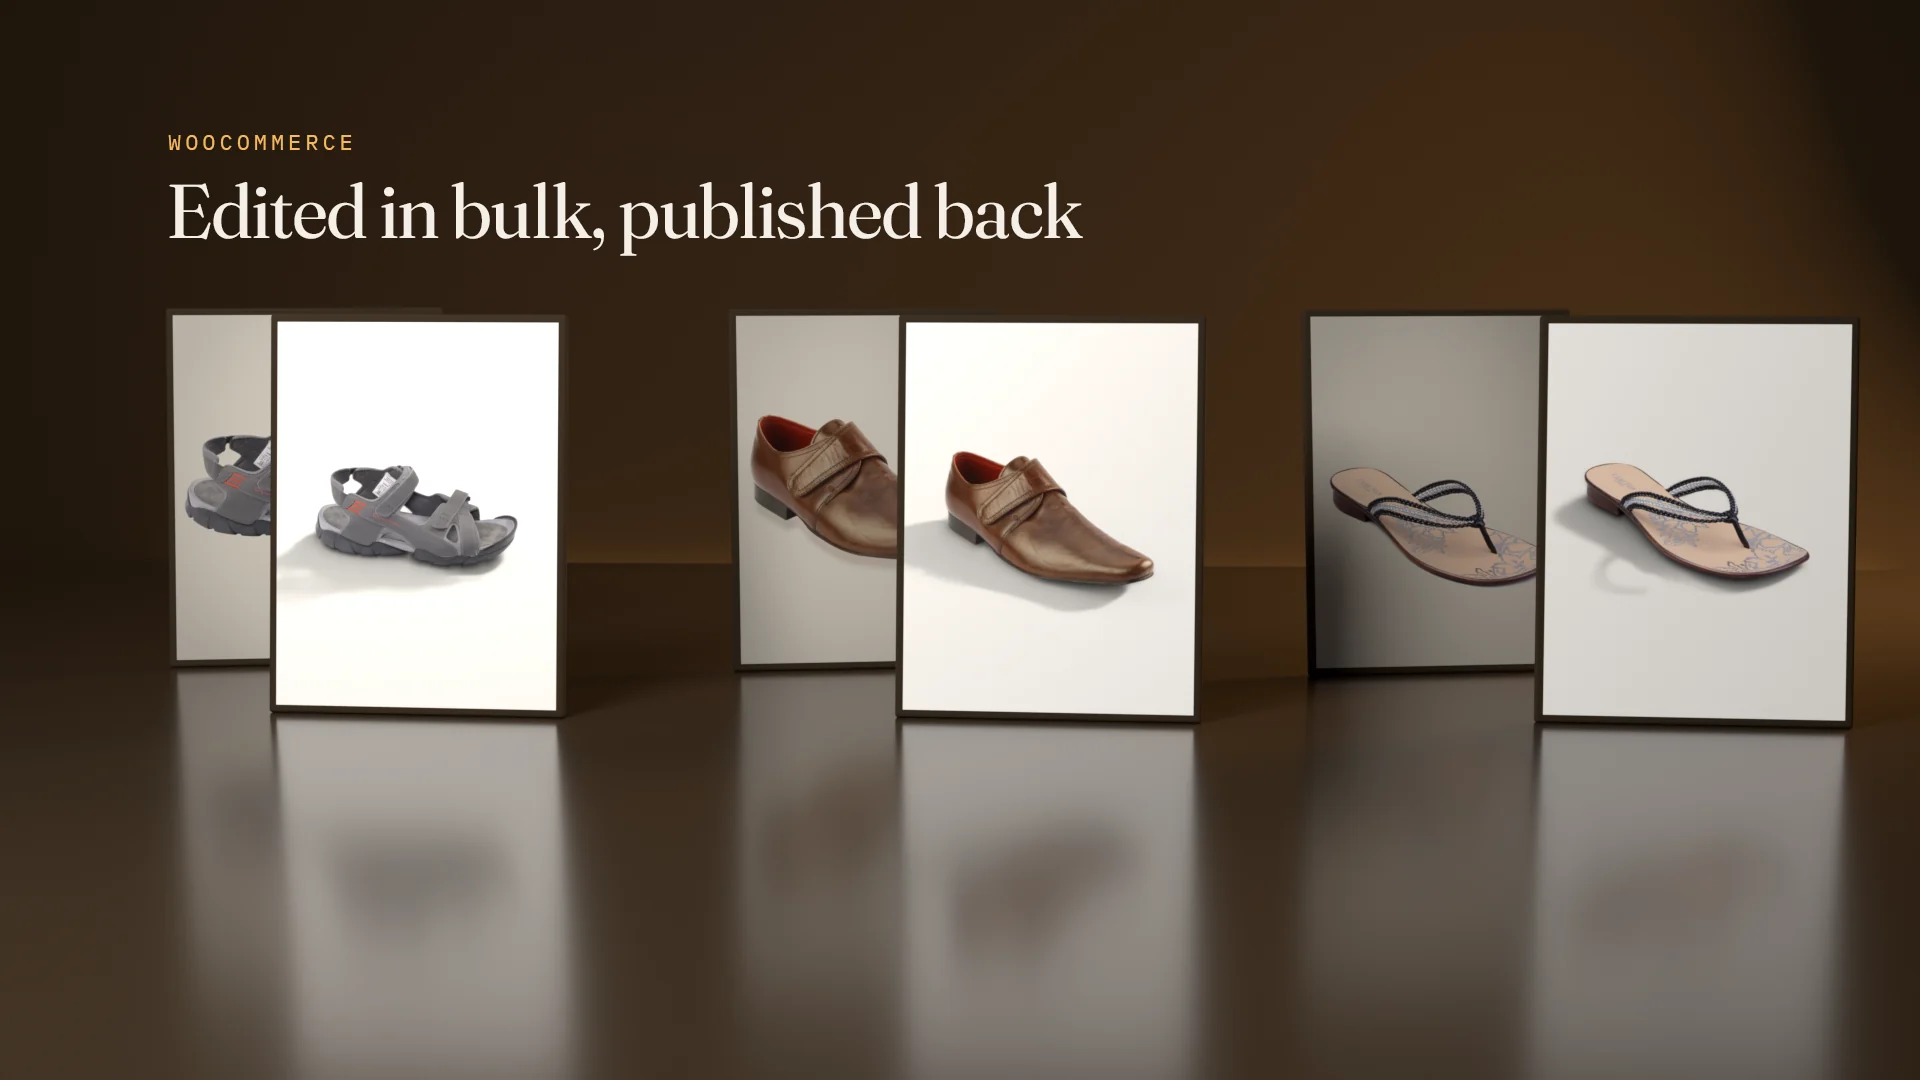
Most WooCommerce photo cleanups go the same way. You download the product images, edit them somewhere, rename them, and upload each one back to the right product and the right gallery slot. The editing is the short part. The file handling is where the afternoon goes, and where the wrong photo ends up on the wrong product.
This is how to do it without the files: edit the photos where the products are, and publish them back to the same places.
Quick answer: Connect your WooCommerce store to PhotoFig, pick photos by product, apply one look to all of them, and review each replacement beside the photo that is live now. Publishing puts each edit in the same place on the same product. The old photo stays in your media library and can be restored from Publish history. It works with standard WooCommerce galleries and variation photos, not with custom gallery plugins.
The screenshots below are one real round trip on a demo store: four products, one look, published and then one of them restored.
What you need
- A WooCommerce store on HTTPS, and an account on it that can approve API access.
- A PhotoFig workspace. Every plan can connect a store, Free included. Only the workspace owner can connect or disconnect it, and a workspace holds one store.
- No plugin. PhotoFig talks to the REST API WooCommerce already ships with.
1. Connect the store
In Preferences, open Integrations, enter the store address, and press Connect. You are sent to your own store, where WooCommerce asks you to approve access, and then back.
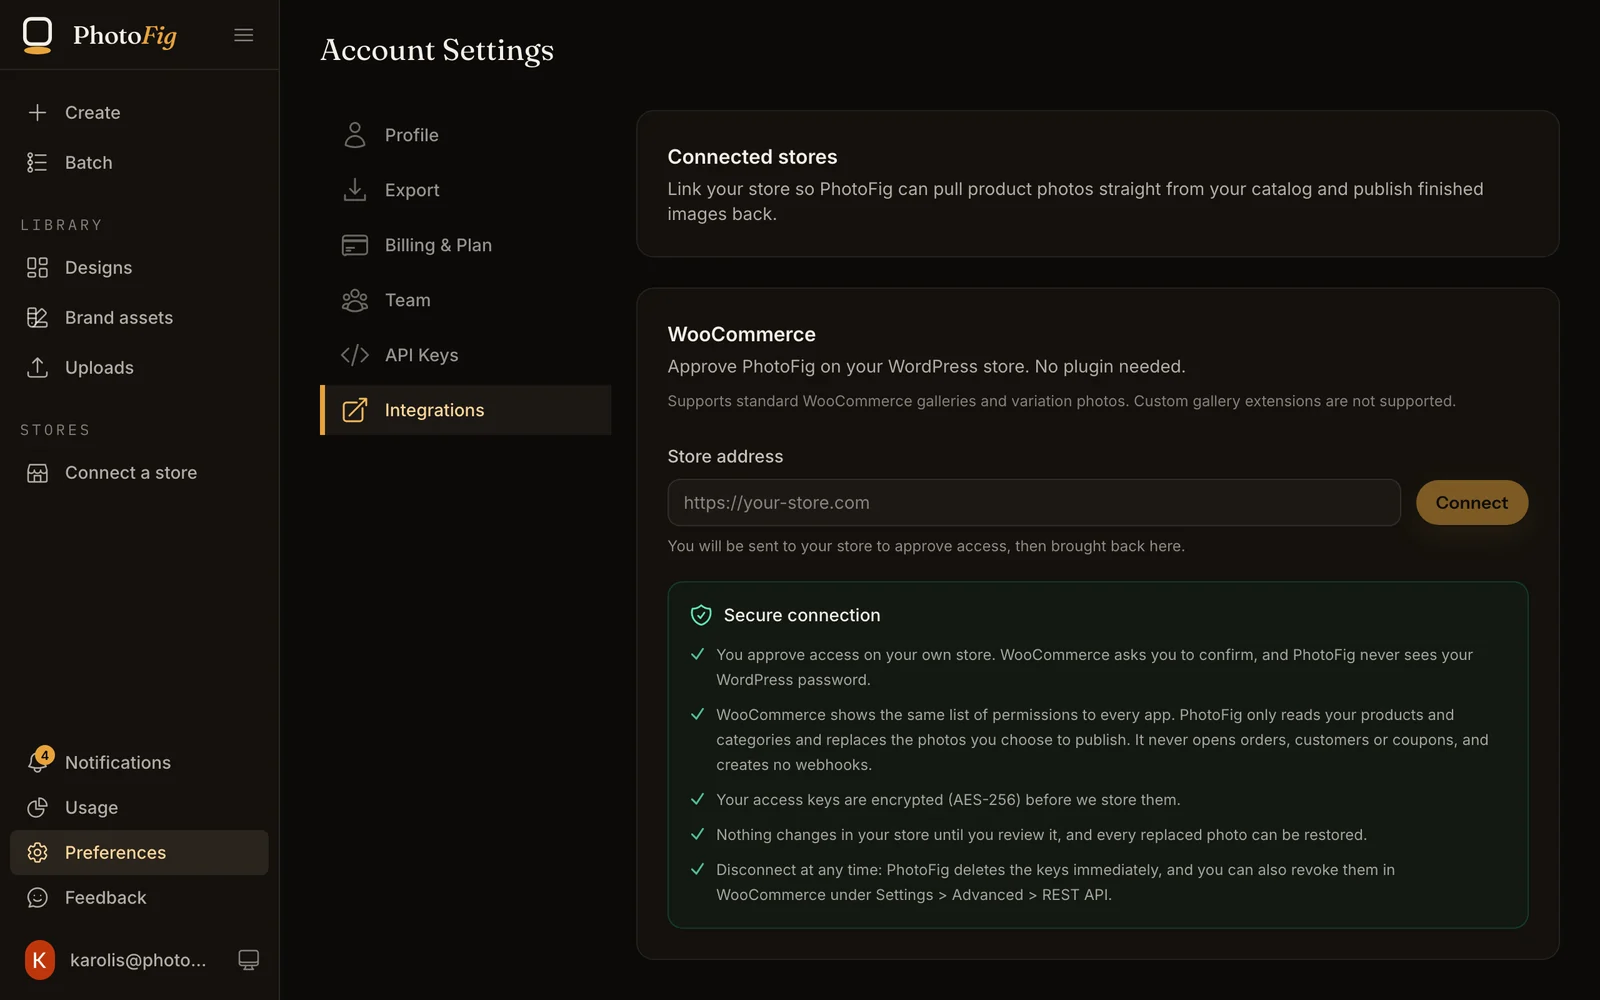
WooCommerce shows the same permission list to every app, so it is worth knowing what is used. PhotoFig reads products and categories and replaces the photos you choose to publish. It does not open orders, customers, or coupons, and it creates no webhooks. The keys are encrypted before they are stored, and disconnecting deletes them.
2. Pick photos by product
The store appears in the sidebar under Stores. The page lists your products with their photos, and you can search by name or SKU, filter by category, or show featured photos only. Click photos to select them, or select everything a filter shows.
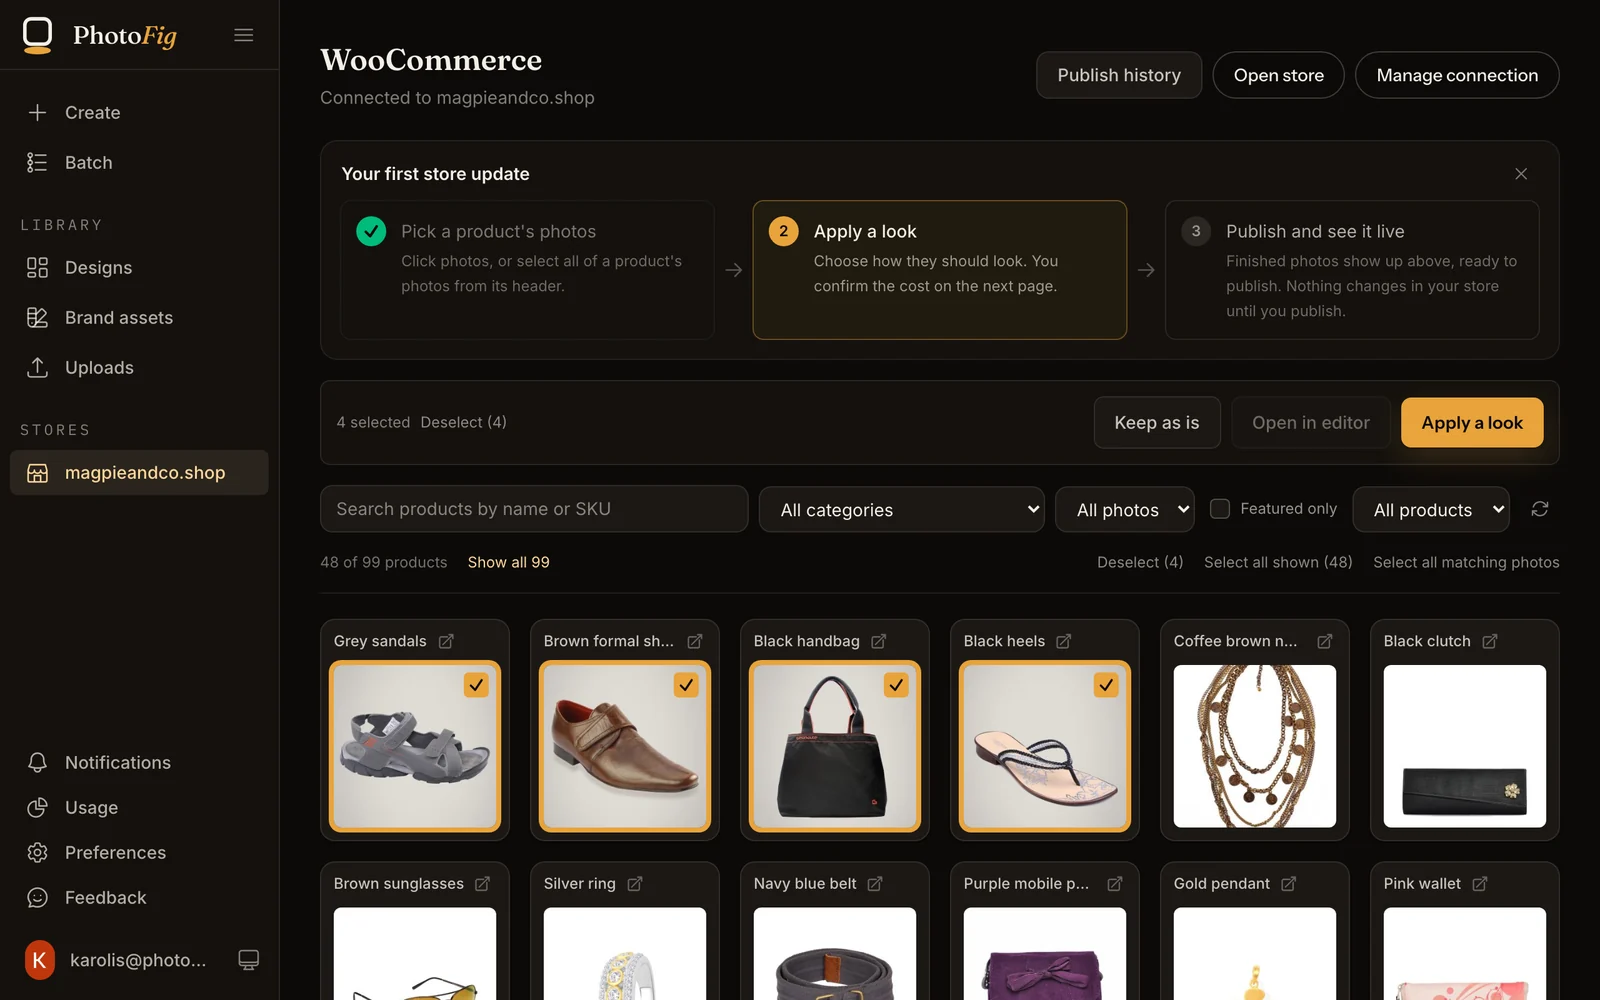
Nothing is pulled from the store until you pick it. Photos you select are copied into PhotoFig; on the Free plan they count toward the 30 new photos a month.
Two things help on a large catalog. The Show filter separates products that still need work from finished ones. And Keep as is marks a photo that is already fine, so it stops showing up as work to do.
3. Apply one look to all of them
Press Apply a look and choose how the photos should look. The built-in looks cover the common jobs: background removal only, a clean white or gray background, black and white, or a resize that keeps the original background. Your own batch templates appear in the same list, so a store can reuse the look that already defines its catalog.
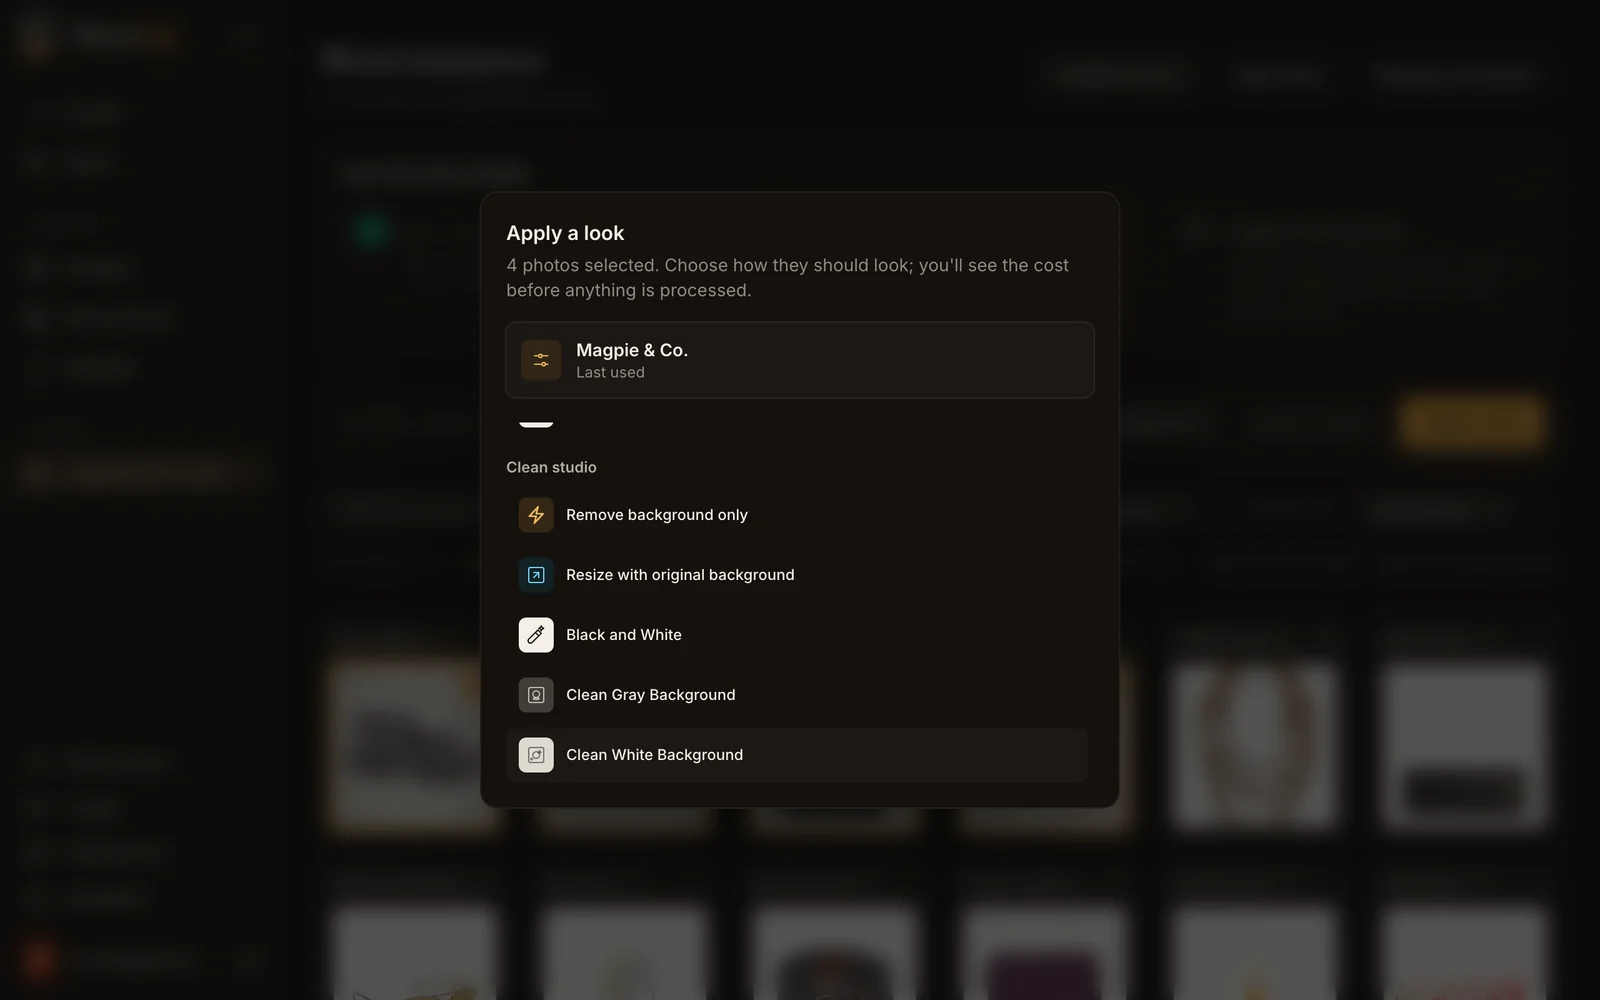
A run opens and the photos process on their own. In this run, Clean White Background removed each background and added a shadow, which used one background removal and one AI credit per photo.
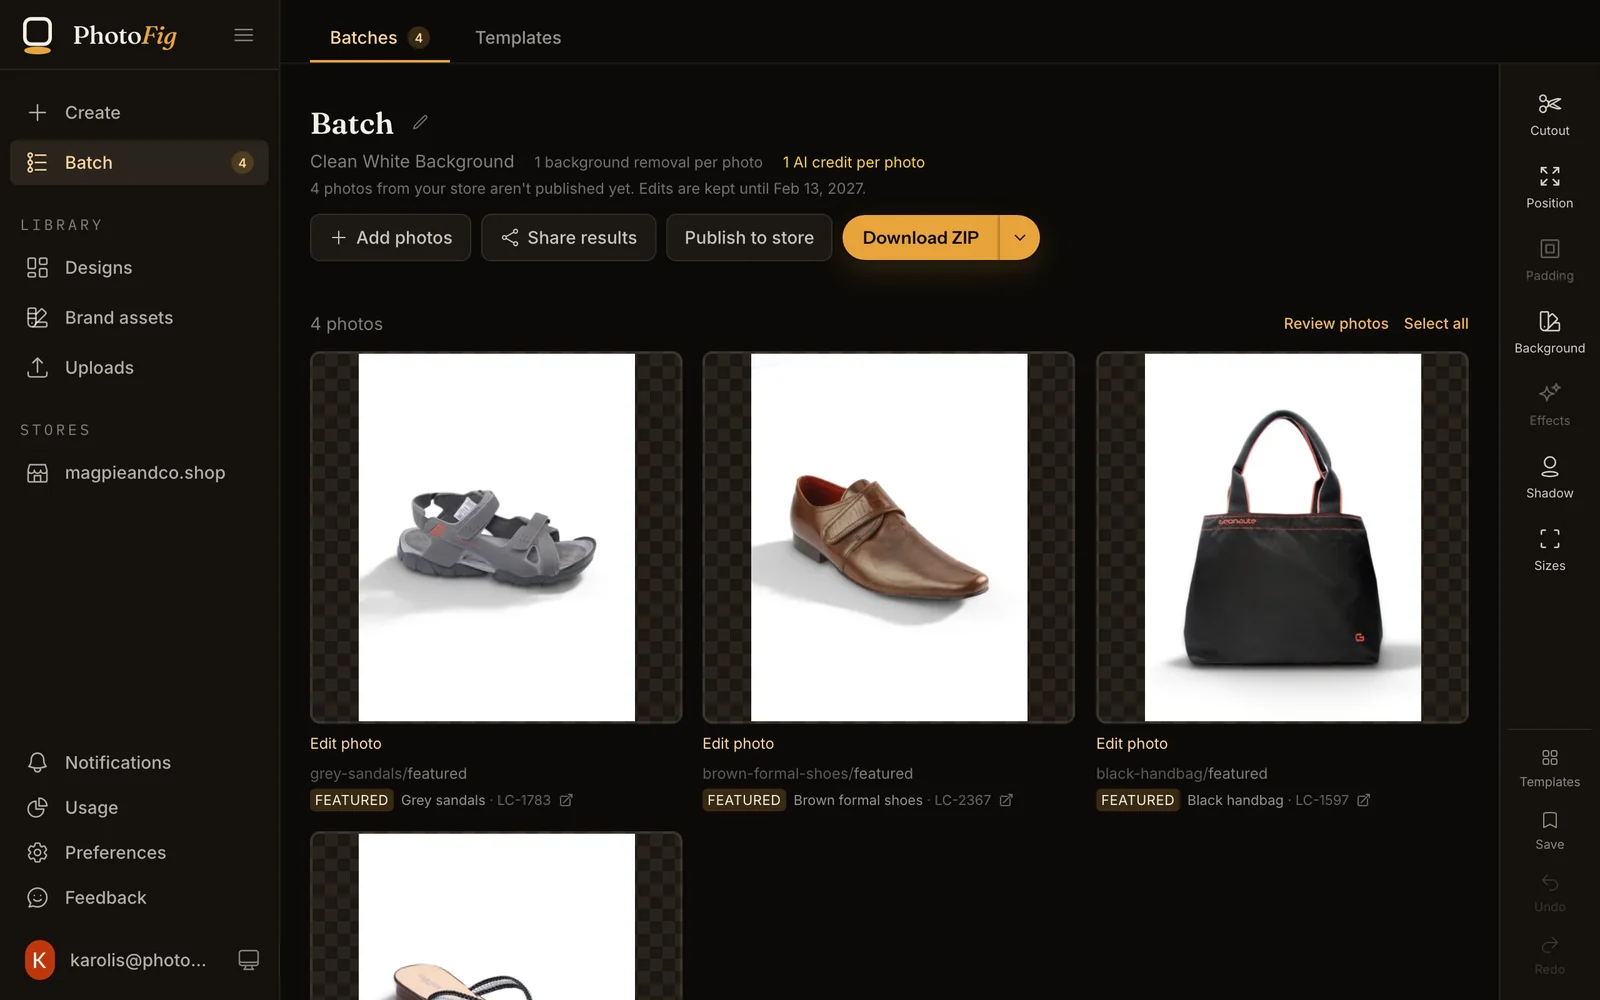
Check the results before you publish. If a cutout missed an edge, fix that one photo in the run; the rest are not touched. If the sizes look uneven from product to product, that is a framing problem, and the size cheat sheet covers what each channel expects.
If you would rather design one photo by hand, Open in editor on the store page takes a single photo into the editor, and it publishes back the same way.
4. Review each replacement
Publish to store does not publish right away. It first checks your store, then opens a review: for every photo, what is live now and what will replace it. Open any pair large and drag the slider across it.
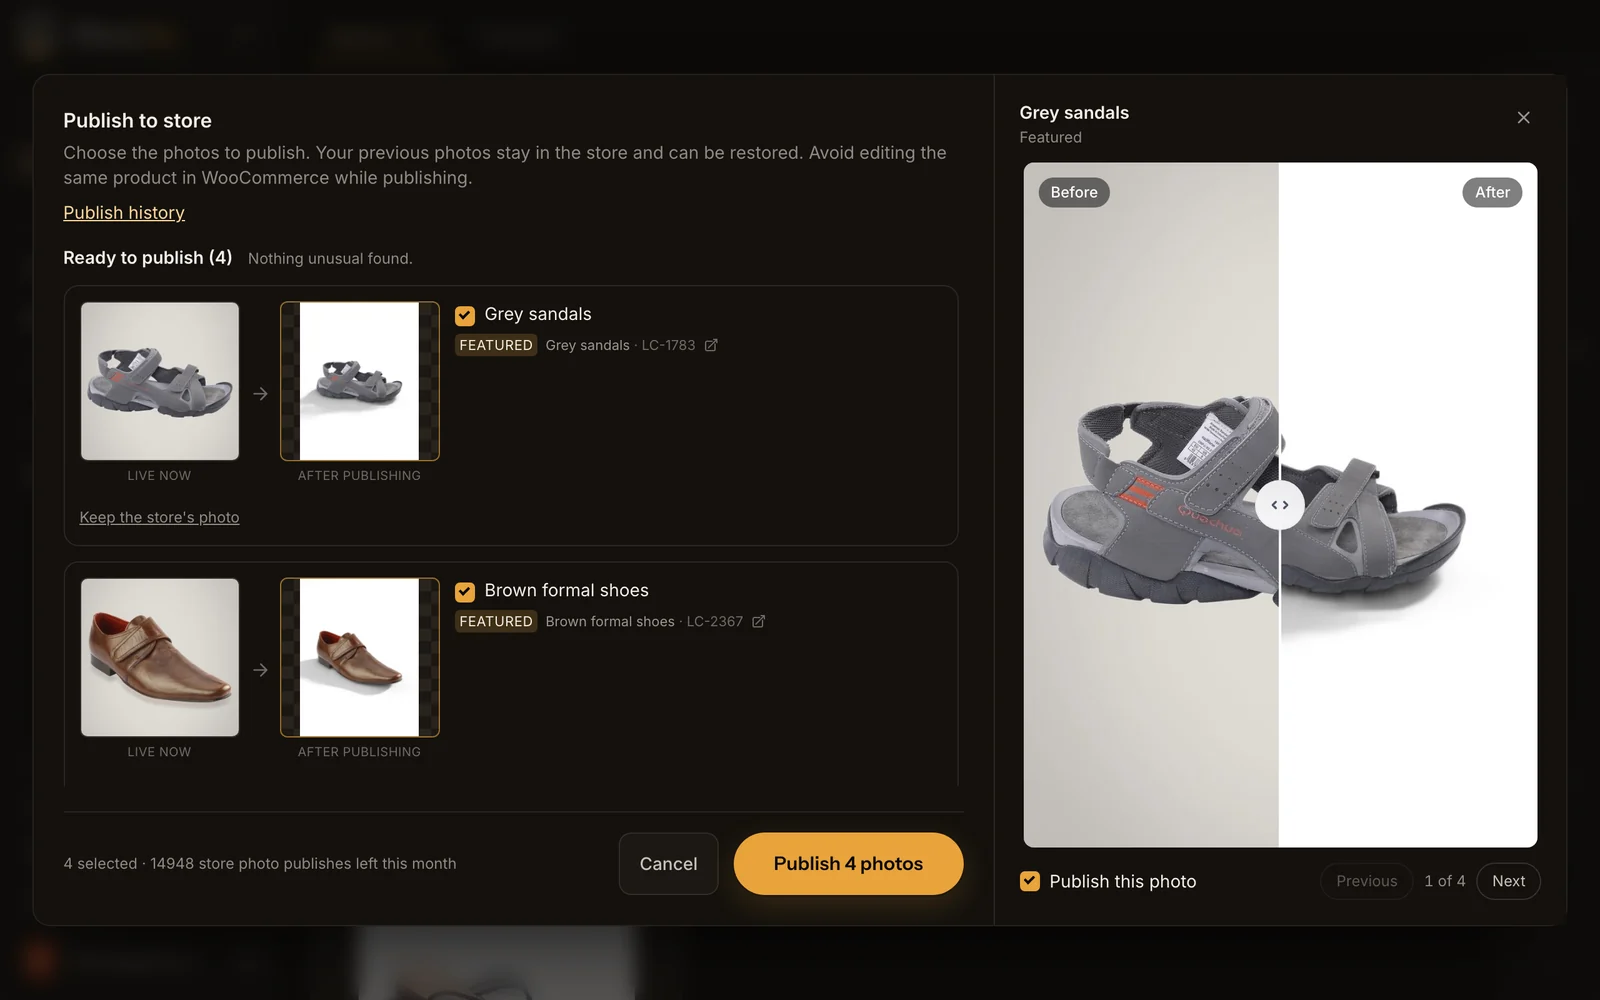
The check is there to catch surprises:
- The photo changed in your store after you imported it. PhotoFig says so and makes you choose to replace the newer version.
- The photo moved or is gone, or the product no longer exists. That photo is held back.
- One photo is used in several places, such as a featured photo that variants inherit. You see every place and choose where the edit goes.
Untick anything you do not want to change, or choose Keep the store’s photo for it. Then publish. It continues if you close the window, and the only advice is not to edit the same product in WooCommerce while it runs.
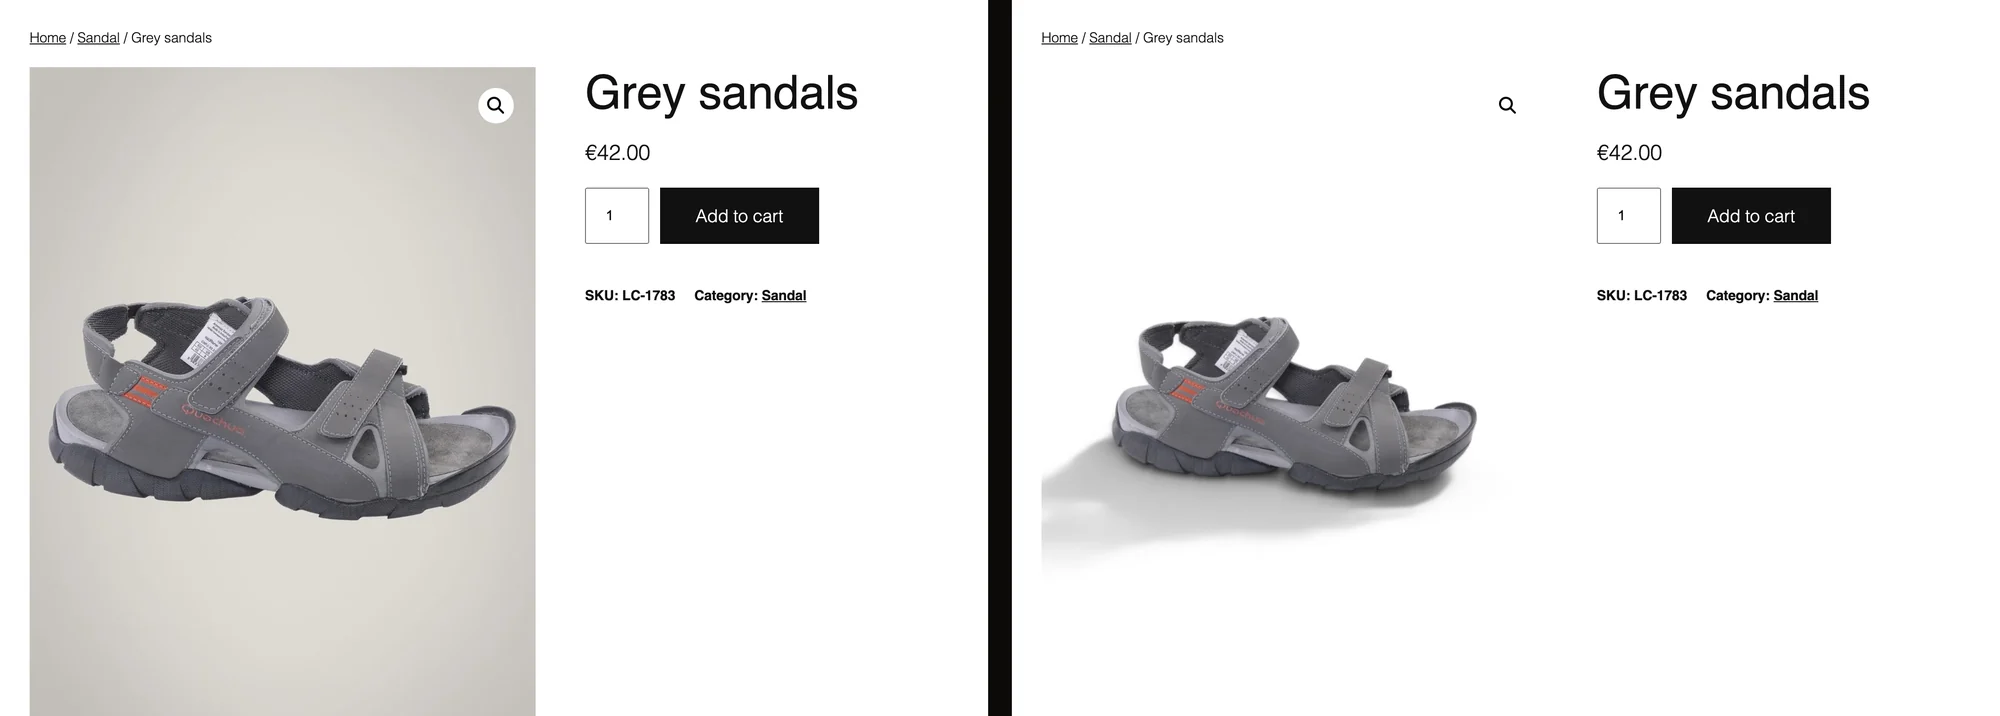
5. Restore a photo if you change your mind
Publishing adds a photo. It does not delete one. The photo that was there stays in your WordPress media library, and Publish history lists every replacement with its before and after.
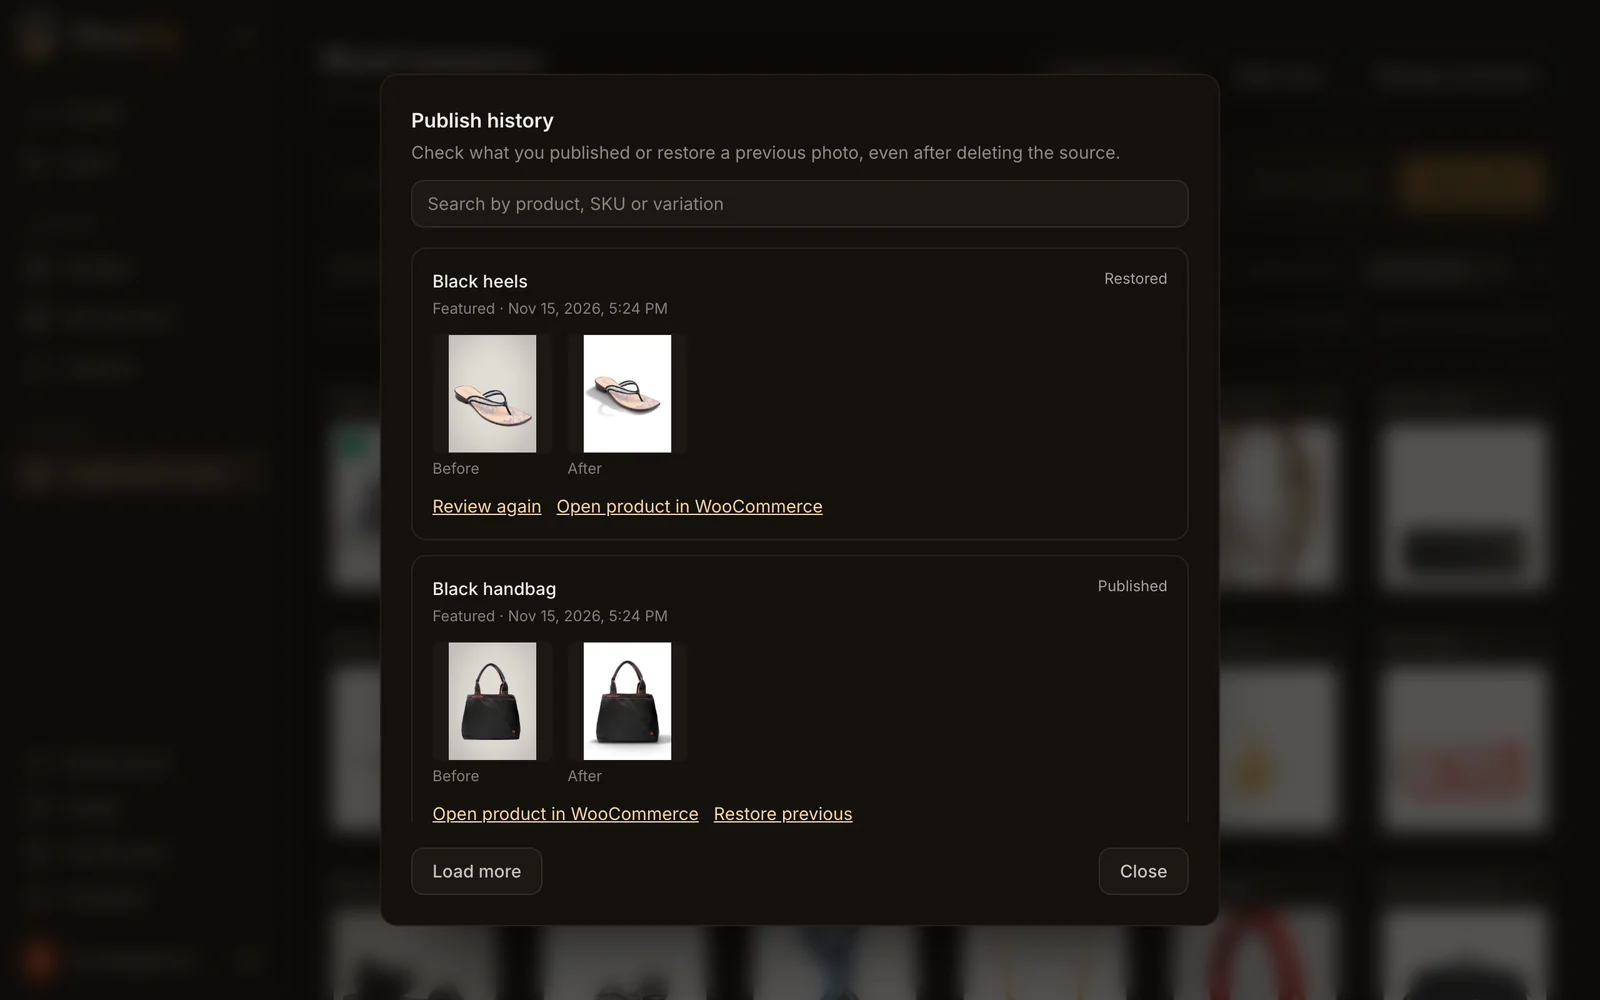
Restore previous puts the old photo back for shoppers right away. Your edit stays in PhotoFig, so you can publish it again later. History keeps working after you delete the run the edit came from.
What it costs
Connecting a store is included on every plan. What a plan sets is how many photos you can publish to the store each month. Limits are from the plan configuration on November 15, 2026.
| Plan | Price | Store photo publishes / month |
|---|---|---|
| Free | $0 | 5 |
| Starter | $9.95 / month | 300 |
| Pro | $29.95 / month | 3,000 |
| Studio | $79 / month | 15,000 |
Editing uses the plan’s normal allowances: background removal is unlimited on paid plans, and looks with an AI shadow or AI background use AI credits. For the numbers on a larger catalog, see what 1,000 cutouts cost.
Edits that came from a store are kept for at least 30 days, and the store page shows the date the oldest ones expire, so an unfinished update does not quietly disappear.
What it does not do
- WooCommerce only. There is no Shopify, Etsy, or eBay connection yet. For those, export from a batch and upload the files.
- Standard galleries and variation photos only. Photos managed by a custom gallery plugin are not read or replaced.
- No automatic sync. New products do not get edited on their own. You pick, review, and publish each update. That is on purpose: nothing goes live unseen.
- Photos only. It does not change titles, descriptions, prices, or stock.
- One store per workspace.
If your photos already look consistent and you only need a different size for a marketplace, you do not need a store connection at all. And if you are choosing between editors, the PhotoFig and Photoroom comparison covers where each one fits. The October update has more on how the store round trip came together.